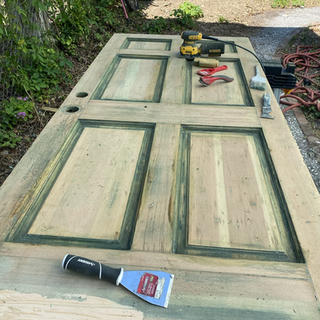
13 Fool Proof Steps to Refinish a Door
- Brandy Wales
- May 7, 2021
- 2 min read
Have you ever taken an old door from "well.... damn" to "BAM!!!"? One that was painted with 5 layers of paint for the past 100 years? It is no small feat, and I think I probably spent 10 hours on it... but, it did save us $1,200 and looks great. Here are 13 fool proof steps you can follow to have the same results!
Step 1: Remove the door from the frame and start sanding.
Step 2: Realize sanding will take 40 days and 40 nights and head to Lowe's for expert advice.
Step 3: Return with paint stripper.
Step 4: Continue stripping the paint with a putty knife. You will need lots of paint stripper and patience.
Step 5: Give up on using paint stripper and start sanding.
Step 6: Head back to Lowe/s for MORE paint stripper.
Step 7: Pour paint stripper into all of the nooks and crannies and continue digging with putty knife. Use random tools like wire brushes, paint brushes, and cloths to help.
Step 8: Head back to Lowe's and purchase wood prep wash to remove excess paint in hopes of removing black paint from all of the corners.

Step 8: Wash the wood and begin the process of sanding again. Sand five separate times! 60 grit... 80 grit... 180 grit... 220 grit... 320 grit. Use the tiny wire brush to brush darkness out of the crevices.

Step 9: Stain the door. Add one layer, let it set for 10 minutes, wipe it off, then stain with a second layer.
Step 10: Wait until it is fully drive and use a foam brush to apply a high gloss poly on top of the stain. Don't shake the can or you will get bubbles!
Step 11: Allow the finished product to sit under a tarp during a storm and check on it two days later to see the door has been ruined. (THE.WORST.EVER.)
Step 12: Reapply stain in cracks and crevices. Reapply poly.

Step 13: This is the most important step. Go on a girls trip and come home to see your husband has added the hardware hung the beautiful door!
All jokes aside, I am thrilled with how it turned out and can't wait to see what it looks like with the house painted and new mailbox hung.


Comments